
Create a web base timeline that is easy to use in various projects, easy view and read, and easy to make in the comfort of your Google Drive.
To get started go to the Timeline JS website: timeline.knightlab.com/#. Make sure you are logged into your Google account and download the TimelineJS Template.
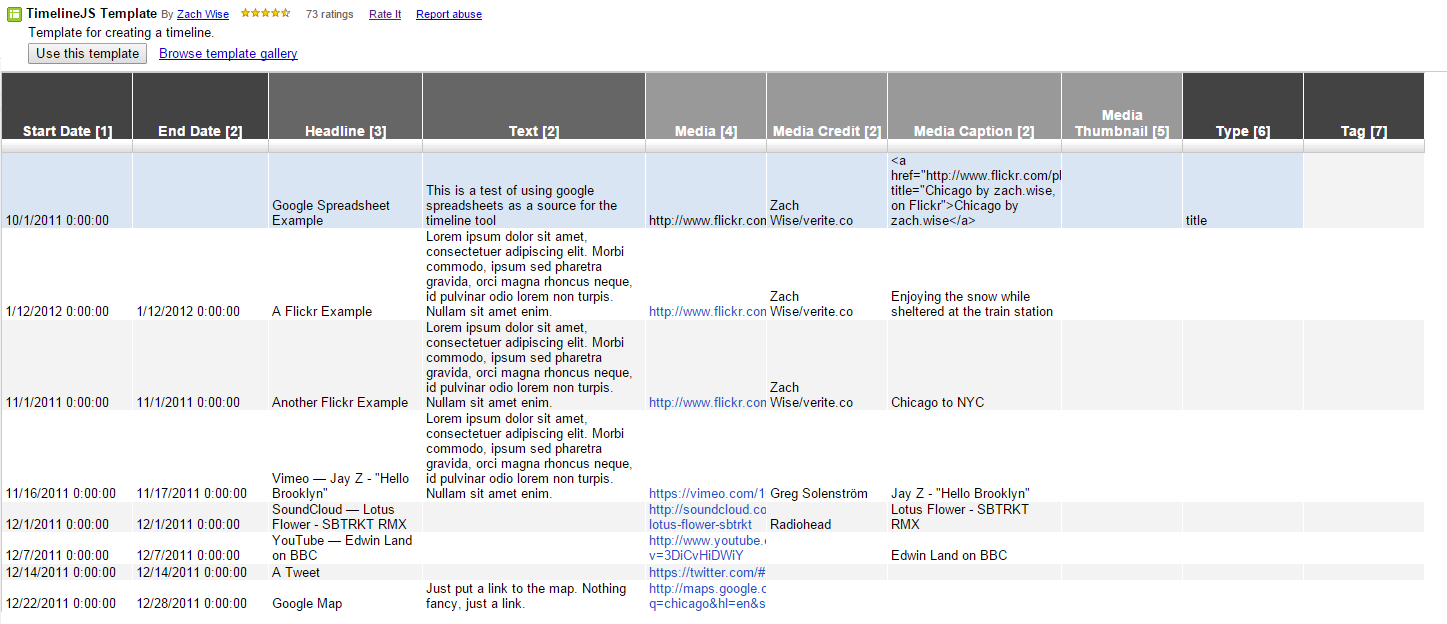
Enter the desired information for each event that will be added to the timeline. Each row is a different event. The only REQUIRED columns on this template are column 1 and column 3 (Start date and Headline), however, the other columns add additional features and details to the timeline.
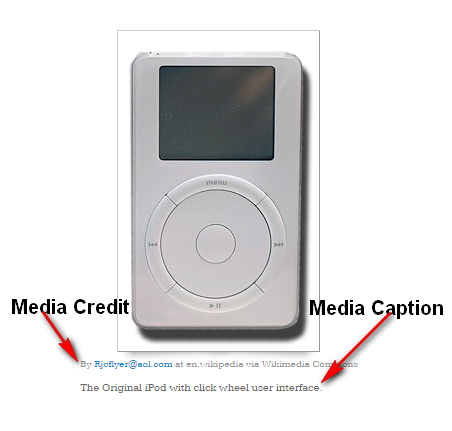
Add an image url to the Media column to include a picture for the event. The Media Credit and Caption columns add information about the picture.
Once all the information is entered into the Google Spreadsheet, publish the spreadsheet:
Click on File
Select “Publish to the Web”
Check “Automatically republish when changes are made.” (this should be the only thing checked)
Click “start publishing”
Copy the URL

Go back to the Timeline JS website and paste the spreadsheet’s URL in the generator box.

Scroll down to the Embed/Preview/Link to Preview buttons.
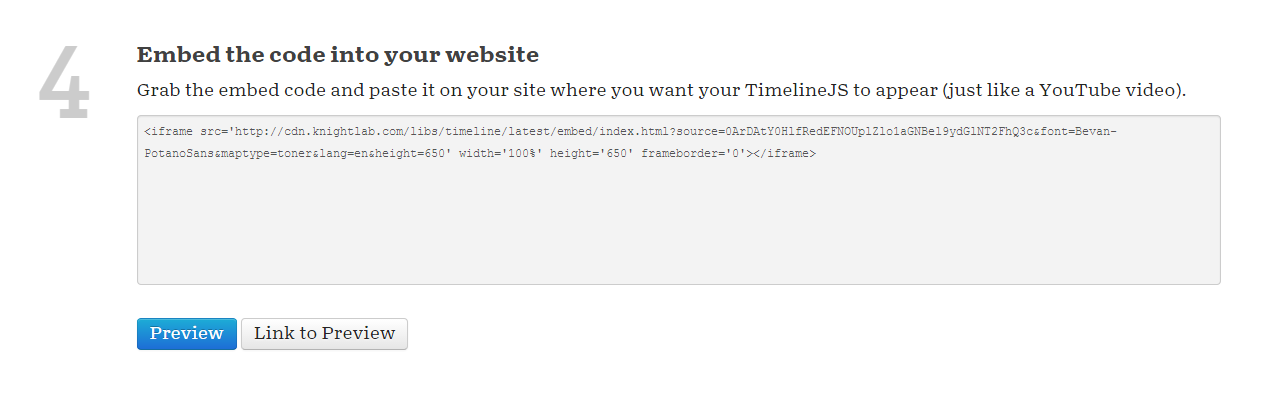
Here you can preview, get a link or get the embed code for the timeline. Save the link to view at anytime or embed the timeline on your webpage.
Questions or comments?
Email me at brandywhitley@johnston.k12.nc.us